NoiiApple

欢迎来到我的blog,我的名字叫秦雷柱,当前坐标北京!

0%

Github Actions CI 工作流程

Github Actions 是 Github 在2018年10月推出的持续集成 (Con­tin­u­ous in­te­gra­tion,简称 CI) 服务,2019年11月正式开放。Github Actions 提供了配置非常不错的虚拟服务器环境,基于它可以进行构建、测试、打包、部署项目。Github Actions 的另一个好处就是 Github 为它专门在市场开辟了专栏,如果你需要某个 Action 的话,完全没必要自己写复杂的脚本,直接引用它人的脚本即可(推荐到 Github市场Github官方Action脚本Awesome Actions 内查找需要的Action)

Github Actions术语:

  1. Workflow 工作流程 (持续集成一次运行的整个流程)
  2. Job 任务 (1~N个Job组成Workflow)
    注意部署的虚拟服务器系统,会影响到Jobs同时触发的个数。免费版部署macos系统最多能触发5个、其它系统则最多能触发20个。详情请查阅 https://help.github.com/cn/actions/reference/workflow-syntax-for-github-actions#usage-limits
  3. Step 步骤 (1~N个Step组成Job)
  4. Action 动作\命令 (1~N个Action组成Step)
  5. Workflow File 配置文件 yaml 格式,需要放置在项目根目录下 .github/workflow/ 内

部署hexo实践

创建项目

首先在 Github 上创建个 github-actions-test 空白仓库,然后再在本地创建个同名的仓库,并跟远程仓库关联起来

1
2
3
4
5
6
7
8
9
10
11
12
13
14
mkdir github-actions-test && cd $_
hexo init && git init

git add .
git commit -m "docs(new):initial"

# 部署静态网站时 Github 默认拉取的分支即该分支
git branch gh-pages

# 关联远程仓库并提交
# 注意:要把 username 换成你的 GitHub 用户名
git remote add origin git@github.com:username/github-actions-test.git
git push -u origin master
git push -u origin gh-pages

配置 hexo _config.yml

1
2
3
4
5
6
7
8
9
10
# URL
## If your site is put in a subdirectory, set url as 'http://yoursite.com/child' and root as '/child/'
# username 换成你的 GitHub 用户名
url: https://username.github.io/github-actions-test
root: /github-actions-test/

# Include / Exclude file(s)
## include:/exclude: options only apply to the 'source/' folder
include:
- .nojekyll

再在 source/ 目录下创建空白文件 .nojekyll

1
2
cd source/
touch .nojekyll

配置 hexo _config.yml 和创建 .nojekyll 是为了绕过 GitHub Pages 上的Jekyll处理,不然 GitHub Pages 会报 The tag fancybox on line 77 in themes/landscape/README.md is not a recognized Liquid tag. 错误。下述是问题参考链接:

https://github.blog/2009-12-29-bypassing-jekyll-on-github-pages/
https://github.com/theme-next/hexo-theme-next/issues/410
https://help.github.com/cn/github/working-with-github-pages/about-github-pages-and-jekyll

创建 Token

在 Github 上 Settings -> Developer settings -> Personal access tokens -> Generate new token 处创建一个新的 token,该 token 只开启一个 repo 权限即可

让Github自动为工作流创建token也行,只需要在需要token的地方换成 ${{ secrets.GITHUB_TOKEN }} 即可。详情请参考 https://help.github.com/en/actions/configuring-and-managing-workflows/authenticating-with-the-github_token

还有一种是ssh-keygen的方式,把公钥保存到 Settings - SSH and GPG keys,私钥保存到 Settings - Secrets https://help.github.com/cn/github/authenticating-to-github/generating-a-new-ssh-key-and-adding-it-to-the-ssh-agent

Note 的名称随意,自己看到知道是什么token就没问题
实在不知道如何创建token的请查阅 https://help.github.com/cn/github/authenticating-to-github/creating-a-personal-access-token-for-the-command-line
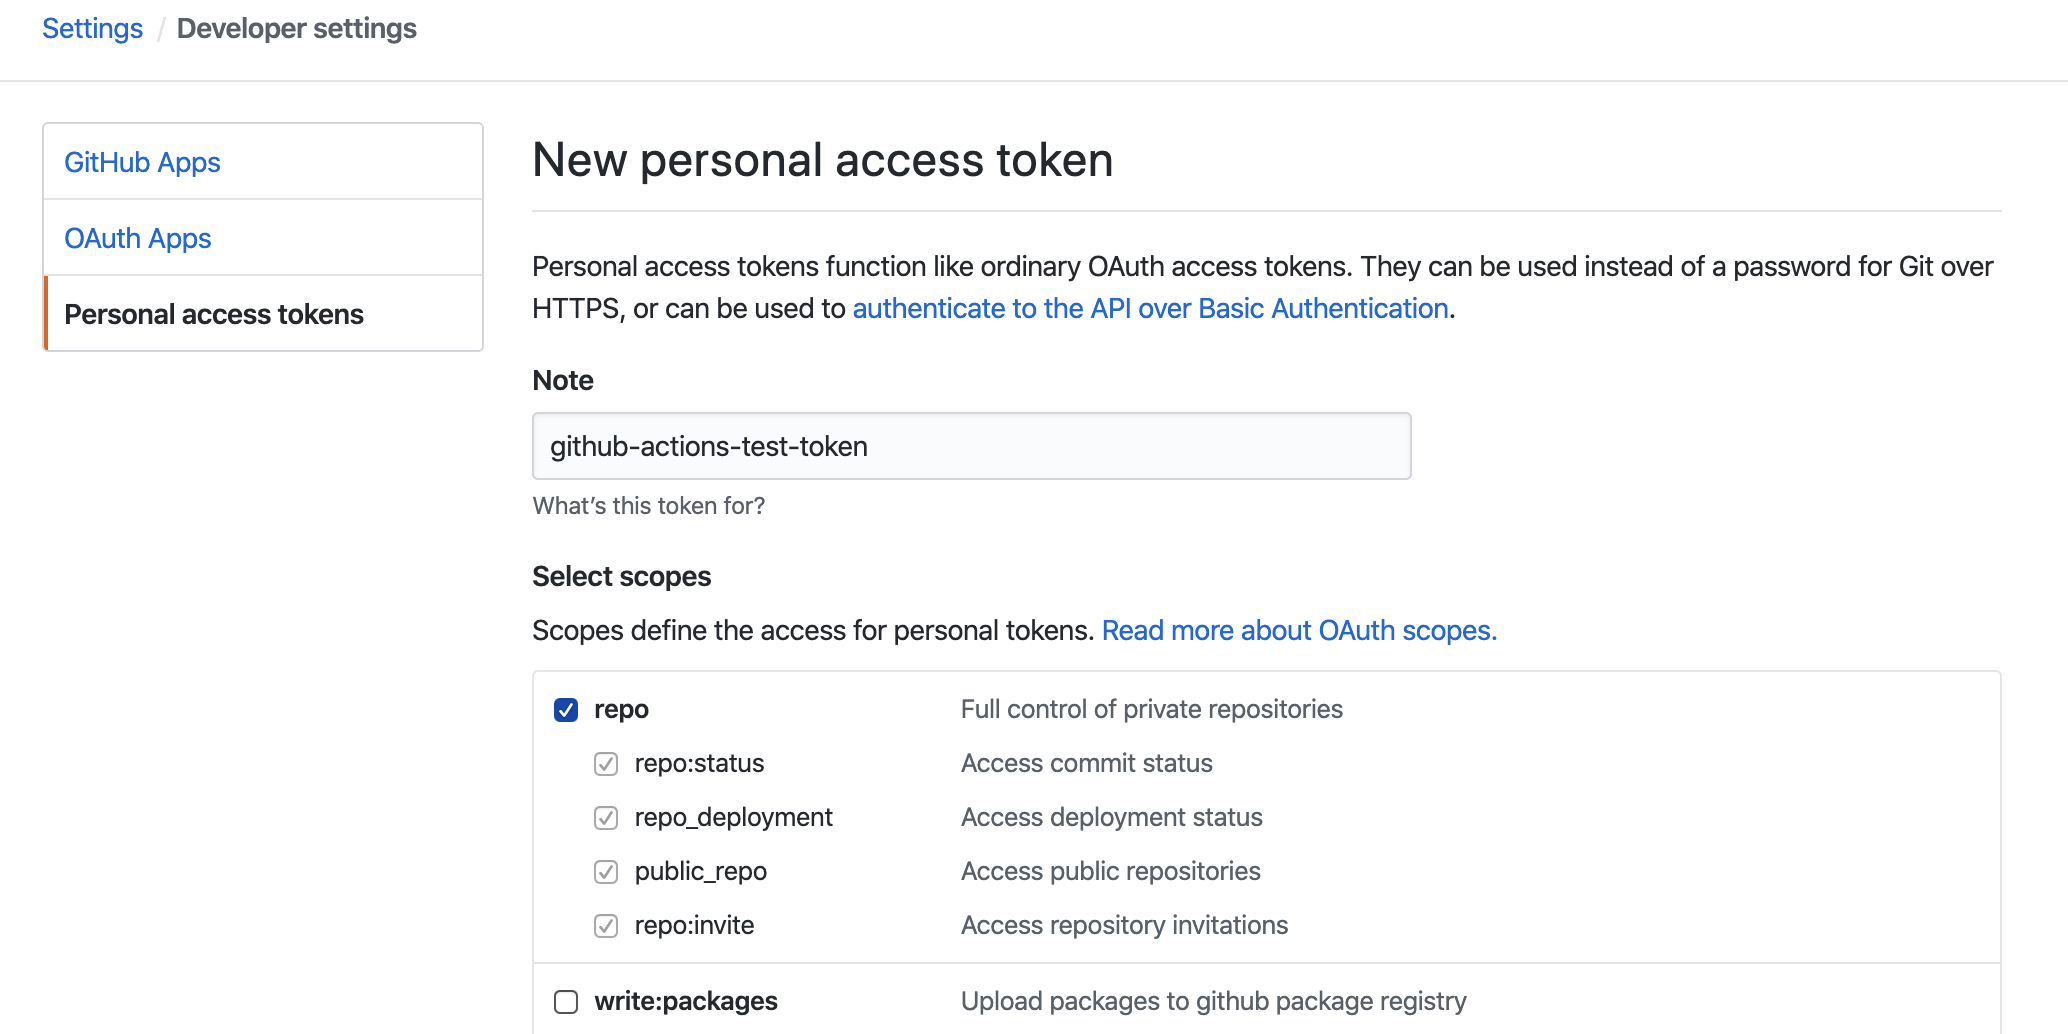
设置好后,滚动到界面最下方,点击 Generate token 按钮进行创建。注意:创建完的 token 只有第一次可见,之后再访问皆无法再见(只能看见 token 的名称),想查看只能重新再创建,因此要保存好这个值

设置 Token

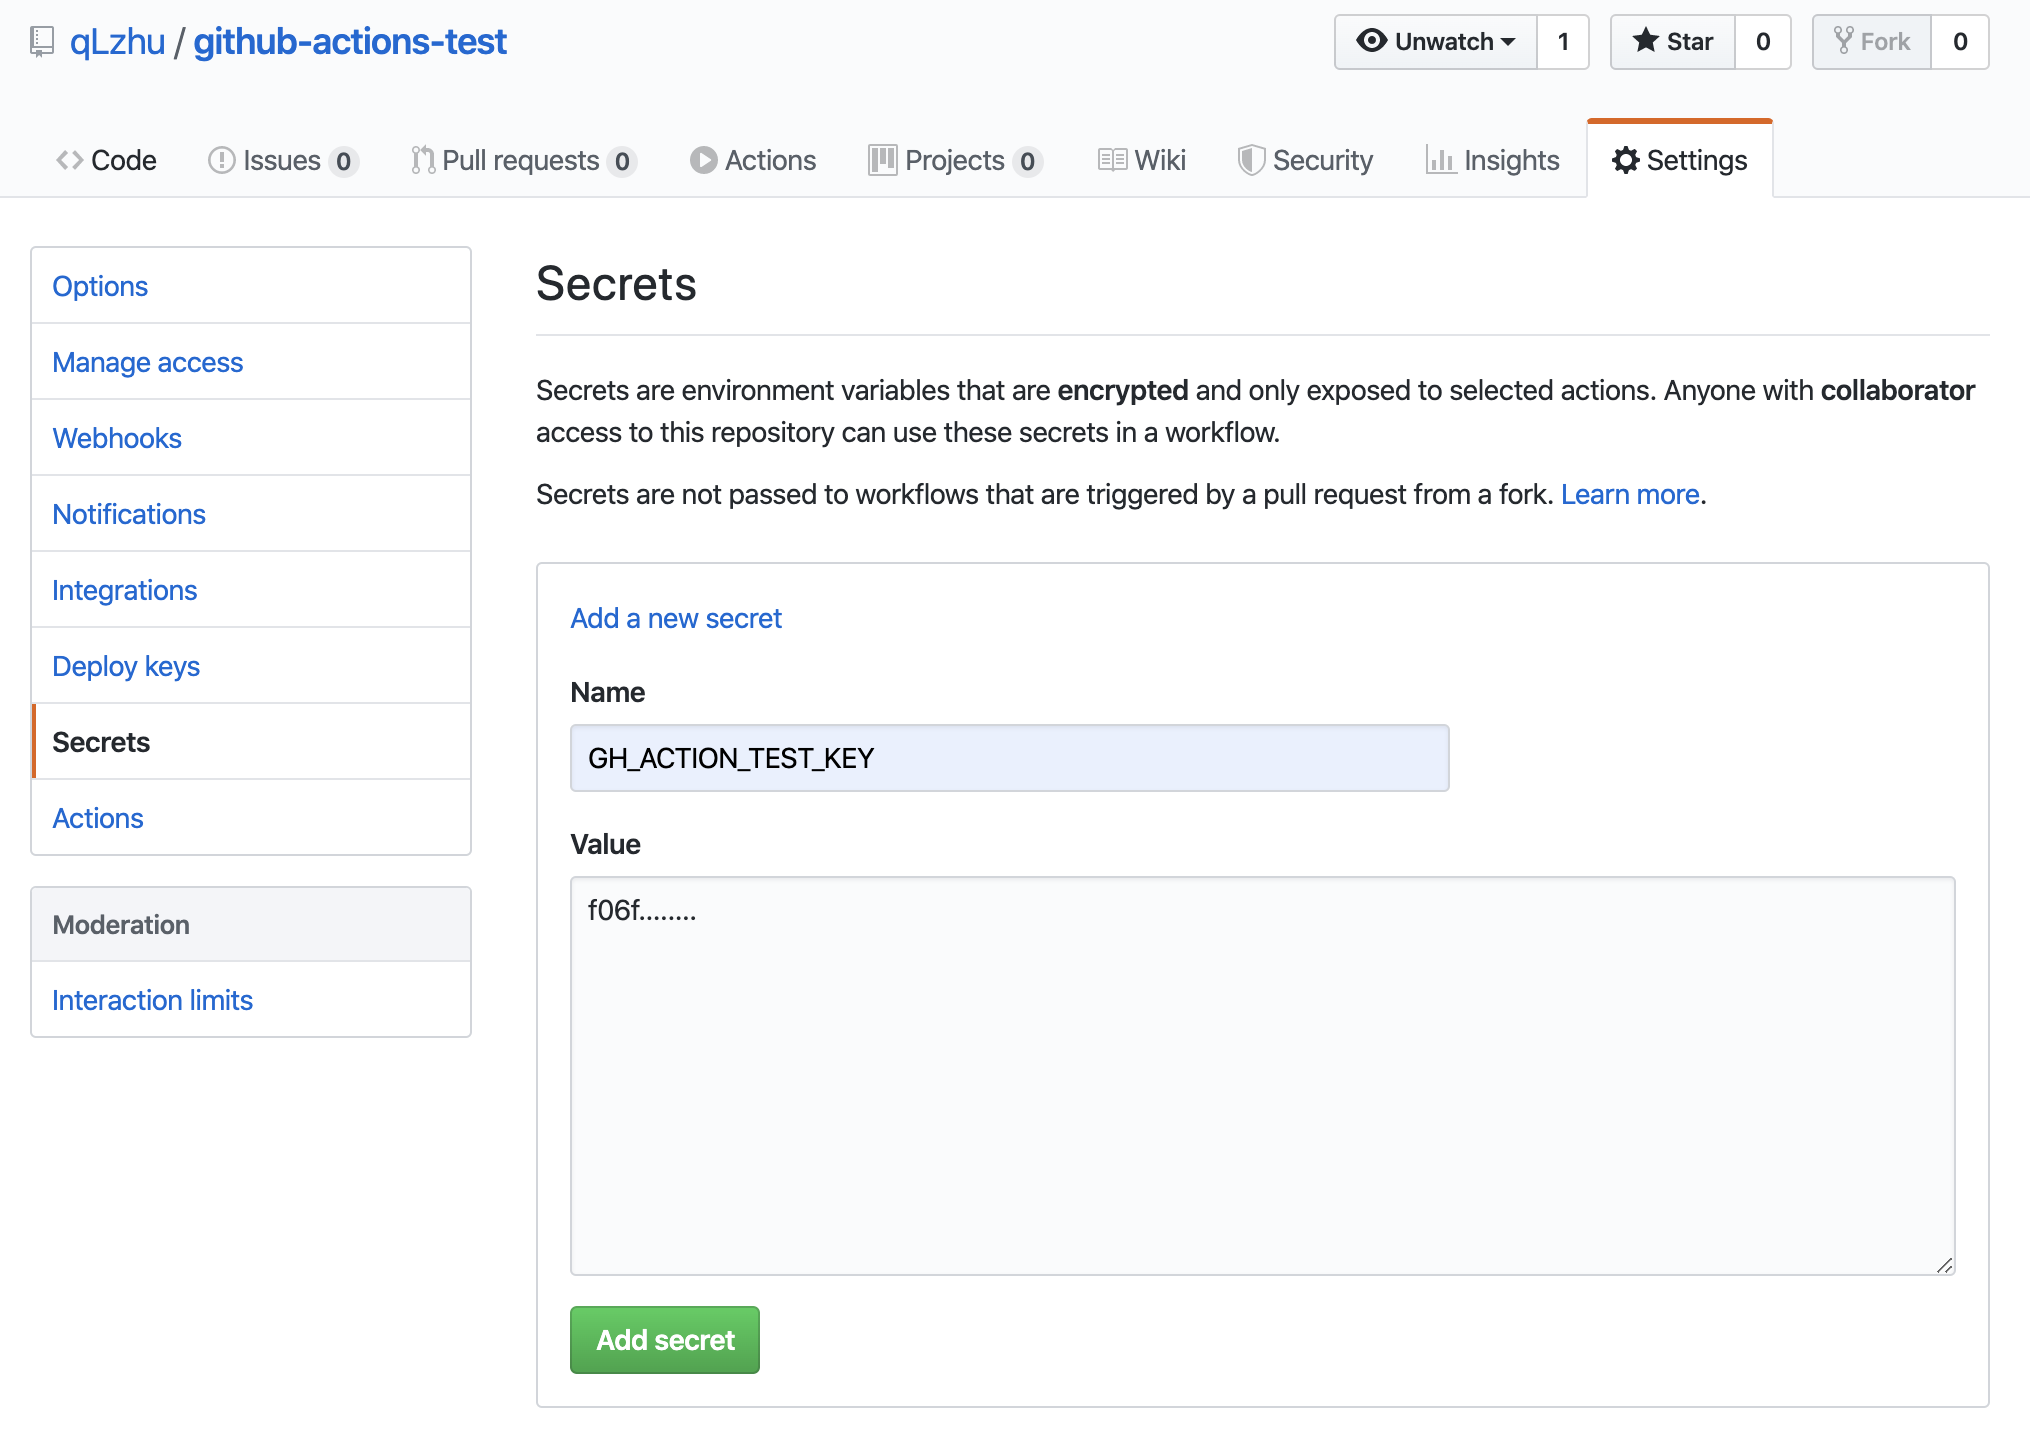
把刚才生成的 token 值保存到当前仓库的 Settings - Secrets 里面。Name 的名称随意,建议名称全部大写并加下划线的形式,Workflow File 配置文件内会用到该名称
配置 Workflow File

在项目的根目录下,创建 .github/workflows/deploy.yml 文件,并键入下述内容

.github/workflows/deploy.ymlview raw
1
2
3
4
5
6
7
8
9
10
11
12
13
14
15
16
17
18
19
20
21
22
23
24
25
26
27
28
29
30
31
32
33
34
35
36
37
38
39
40
41
42
43
44
45
46
47
48
49
50
51
52
53
54
55
56
57
58
59
60
61
62
# 更多参数详情,请查阅
# https://help.github.com/cn/actions
# https://p3terx.com/archives/github-actions-started-tutorial.html
# http://www.ruanyifeng.com/blog/2019/09/getting-started-with-github-actions.html

name: Github Action Build and Deploy #工作流的名称,随便定义

# 触发工作流的事件
# 下面设置的是当 push 到 master 分支后触发
# 其它事件还有 pull_request | page_build | release | ...
# https://help.github.com/en/actions/reference/events-that-trigger-workflows
on:
push:
branches:
- master

# Jobs 即工作流中的执行任务
jobs:
build: #Job_id 名称为 build,自主定义
#name: Deploy webiste #name 是 job_id 的说明,省略后的 name 值,会默认为 Job_id 的值
runs-on: ubuntu-latest #设置虚拟服务器环境(ubuntu最新版本)

# 任务步骤集合
steps:
- name: Pull Code #Action 名称,自主定义
uses: actions/checkout@v2 #使用 Github Action 官方可重用的脚本,actions/checkout 获取源码
#@ 后面可指定分支、release 版本或特定的 commit
#https://help.github.com/cn/actions/building-actions/about-actions#versioning-your-action
# with: #当前 actions 的一些配置
# submodules: true #项目内有 Git 子项目时可以设为 true,拉取的时候会一并拉取下来

- name: Install Node
uses: actions/setup-node@v1
with:
node-version: "10.x" #设置要安装的 Node 版本

- name: NPM Install Packges #设置 npm 要执行的步骤,当成本地操作就行
# run: npm install #run 可设置执行的命令,一个 step 直接写,多个按照下方格式写
run: |
npm install hexo-cli -g
npm install
hexo clean
hexo generate

- name: Deploy
uses: JamesIves/github-pages-deploy-action@releases/v3
with:
ACCESS_TOKEN: ${{ secrets.GH_ACTION_TEST_KEY }} #在 Settings/Secrets 内设置的 token 名称
#未创建个人Token的,请换成${{ secrets.GITHUB_TOKEN }}
BRANCH: gh-pages #要部署到哪个分支
FOLDER: public #从那个文件夹内复制静态文件
COMMIT_NAME: "Github Pages Deploy Action"

# 以下是 Jobs 的执行顺序说明
# 不要复制
# -------------------------------------------
# jobs2:
# needs: build
# job3:
# needs: [build, jobs2]
# -------------------------------------------
# 多个任务时,使用 needs 排列执行顺序,否则同时运行

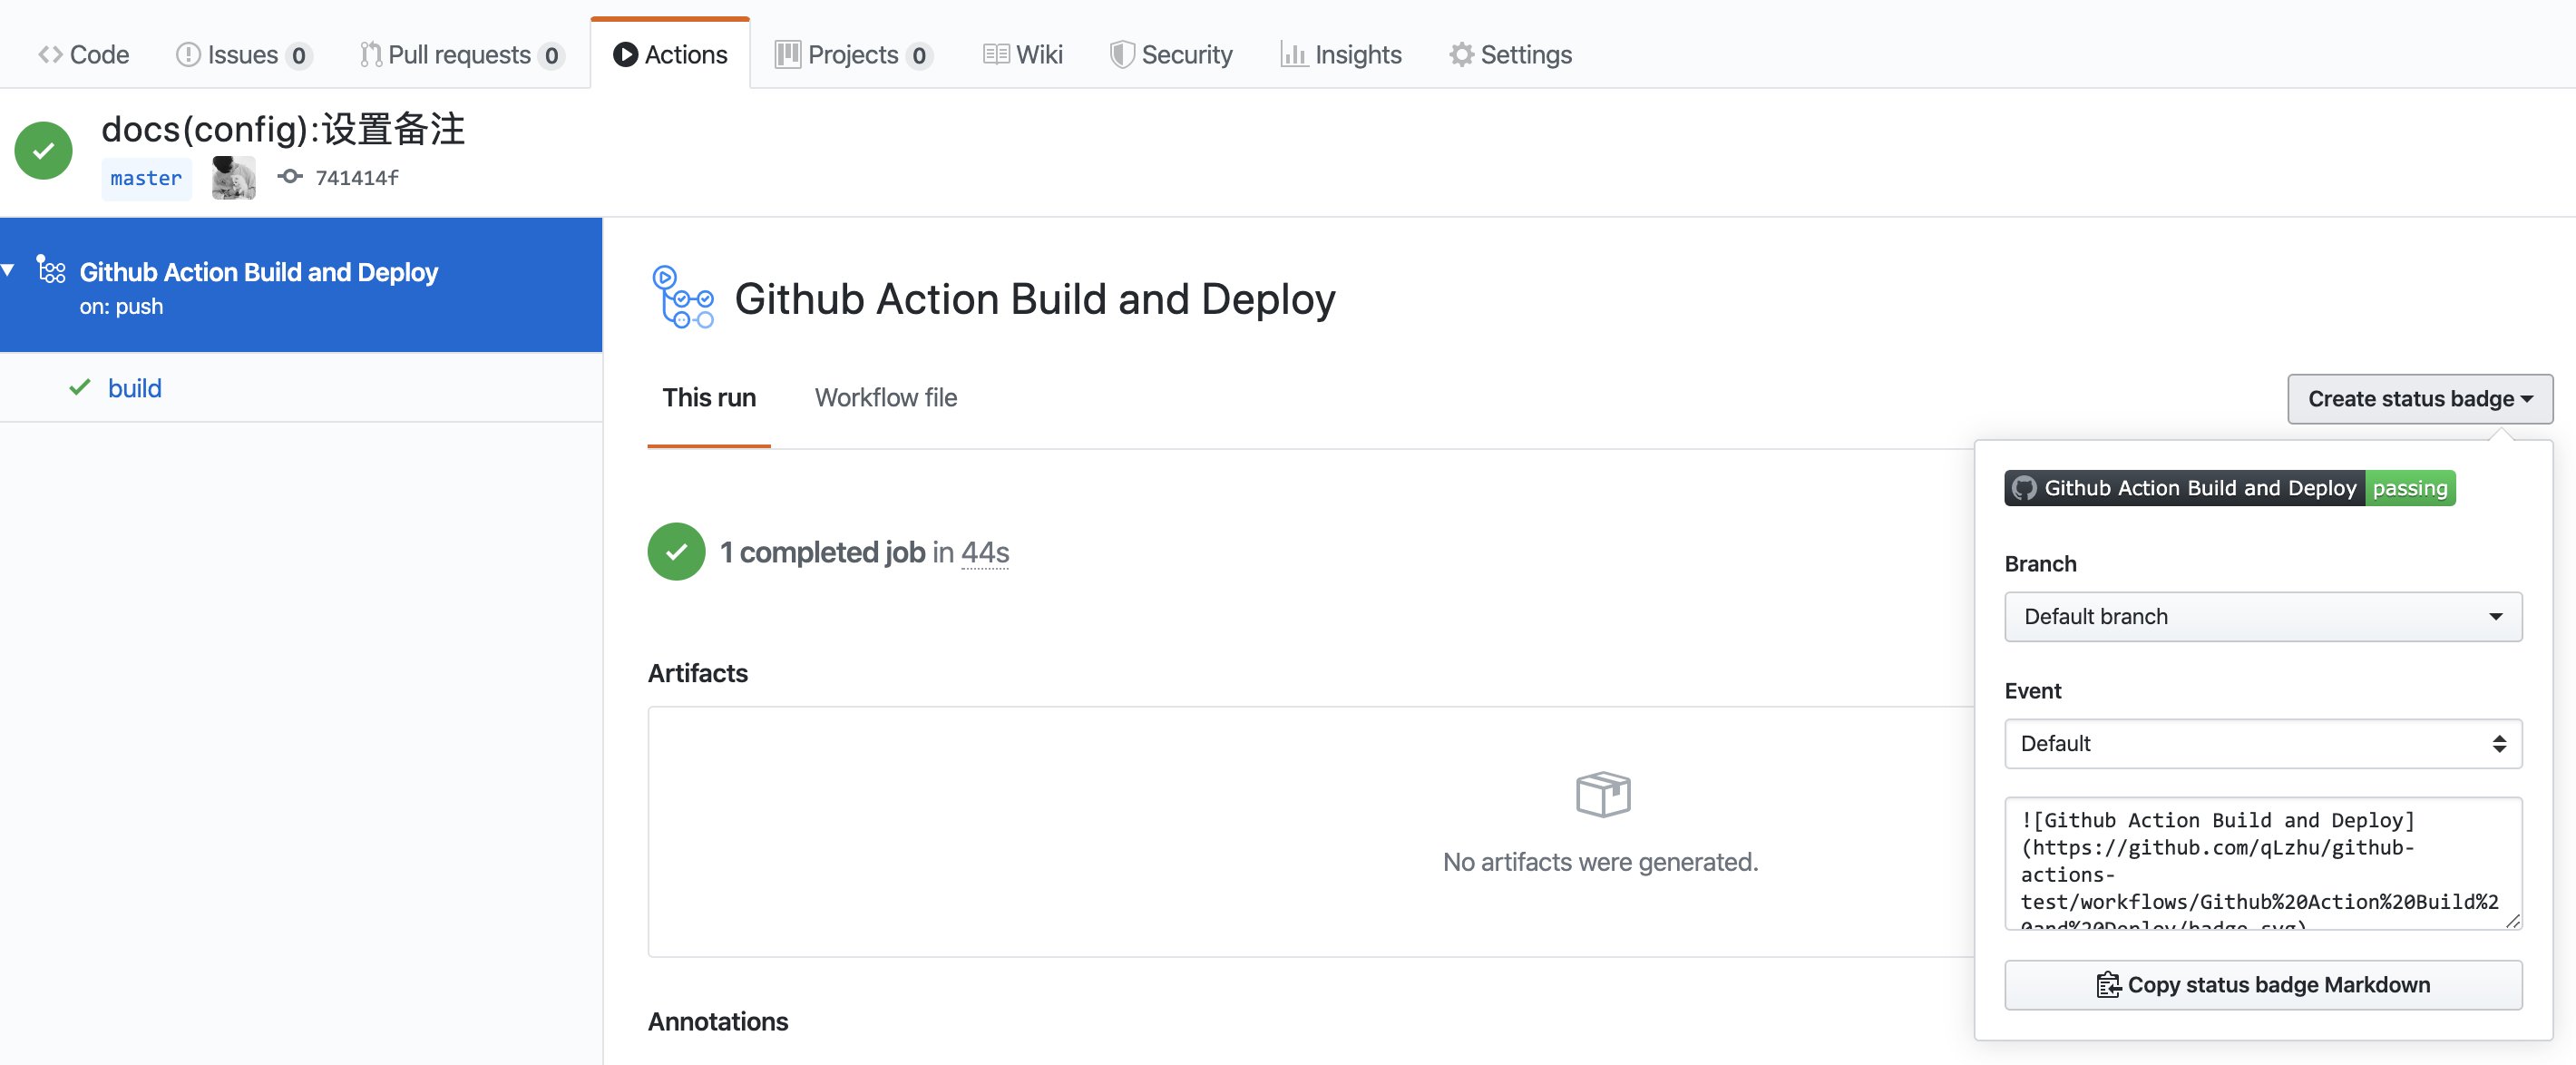
编辑完成后 push 到远程仓库,紧接着 Actions 就会显示构建界面

你还可以把 build passing 图标放置在你想展示的地方
Github Actions限制策略:

  1. 每个仓库只能同时支持20个Workflow并行,每个Workflow最多允许运行72小时,超时会自动取消该工作流
  2. 每小时可以调用1000次GitHub API
  3. 每个Job最多可以执行6个小时,超过该时间会自动终止Job
  4. 私有仓库每月累计使用时间为2000分钟,超过后$0.008/分钟,公共仓库则无限制

虽然名称叫持续集成,但当所有任务终止和完成时,虚拟环境内的数据会随之清空,并不会持续。即每个新任务都是一个全新的虚拟环境。