新建项目
登陆 GitHub 创建一个空的开源项目 trcl(项目名称随意,初次测试 Travis CI 最好跟着本文逐步操作,了解后再自己测试)

项目新建后,再使用如下命令初始化本地项目(不能直接 Git Clone 到本地再初始化,因为 hexo init 的必须是空白项目)
1 | mkdir trcl && cd $_ |
和远程 origin(克隆版本库的时候,所使用的远程主机自动被Git命名为origin )建立链接关系
1 | git remote add origin git@github.com:***/trcl.git |
landscape 主题更改为 NexT 主题,并提交到远程仓库
1 | git clone https://github.com/theme-next/hexo-theme-next themes/next |
配置 Hexo _config.yml
把 gh-pages 分支提交到远程仓库后,Github 会直接把该分支作为静态网站进行部署,无需额外设置。生产的二级网址格式是 https://username.github.io/trcl,把 username 更换成你 Github 的用户名填写到下面(不知道用户名的请到 Github Settings -> GitHub Pages 处查看)
1 | # URL |
创建 Token
在 Github 上 Settings -> Developer settings -> Personal access tokens -> Generate new token 处创建一个新的 token,该 token 只开启一个 repo 权限即可
Note的名称随意,自己看到知道是什么token就没问题
实在不知道如何创建token的请查阅 https://help.github.com/cn/github/authenticating-to-github/creating-a-personal-access-token-for-the-command-line
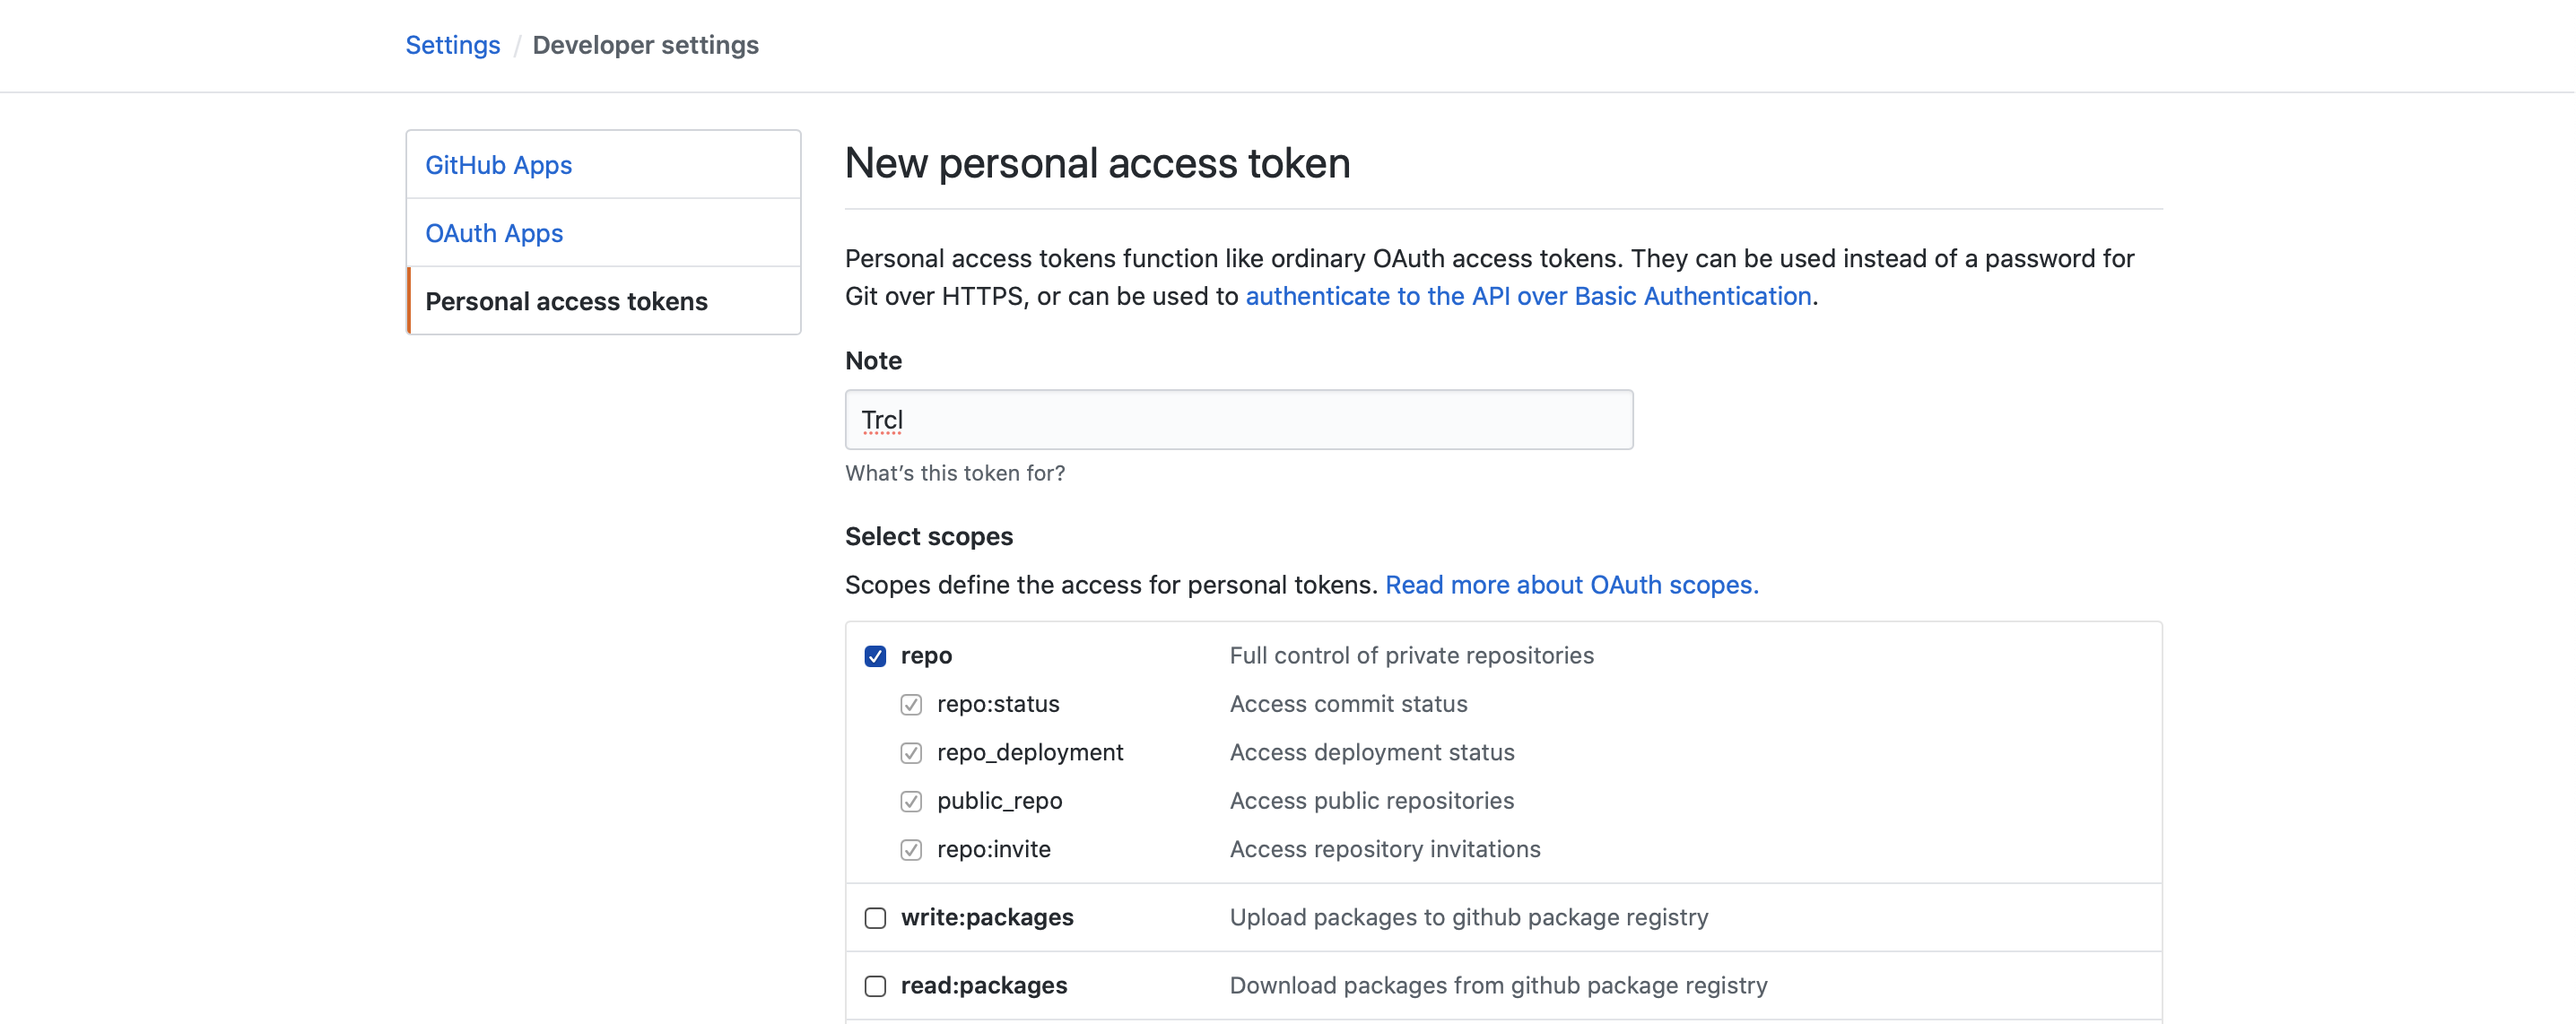
设置好后,滚动到界面最下方,点击 Generate token 按钮进行创建。注意:创建完的 token 只有第一次可见,之后再访问皆无法再见(只能看见 token 的名称),想查看只能重新再创建,因此要保存好这个值

配置 Travis CI
登陆或注册 Travis CI 需要使用 GitHub 账户,成功后应该是如下界面。到该界面后选择以下任意一个按钮点击(+或者Activate all repositories using github apps),进行 GitHub 项目的选择进行部署 Travis CI
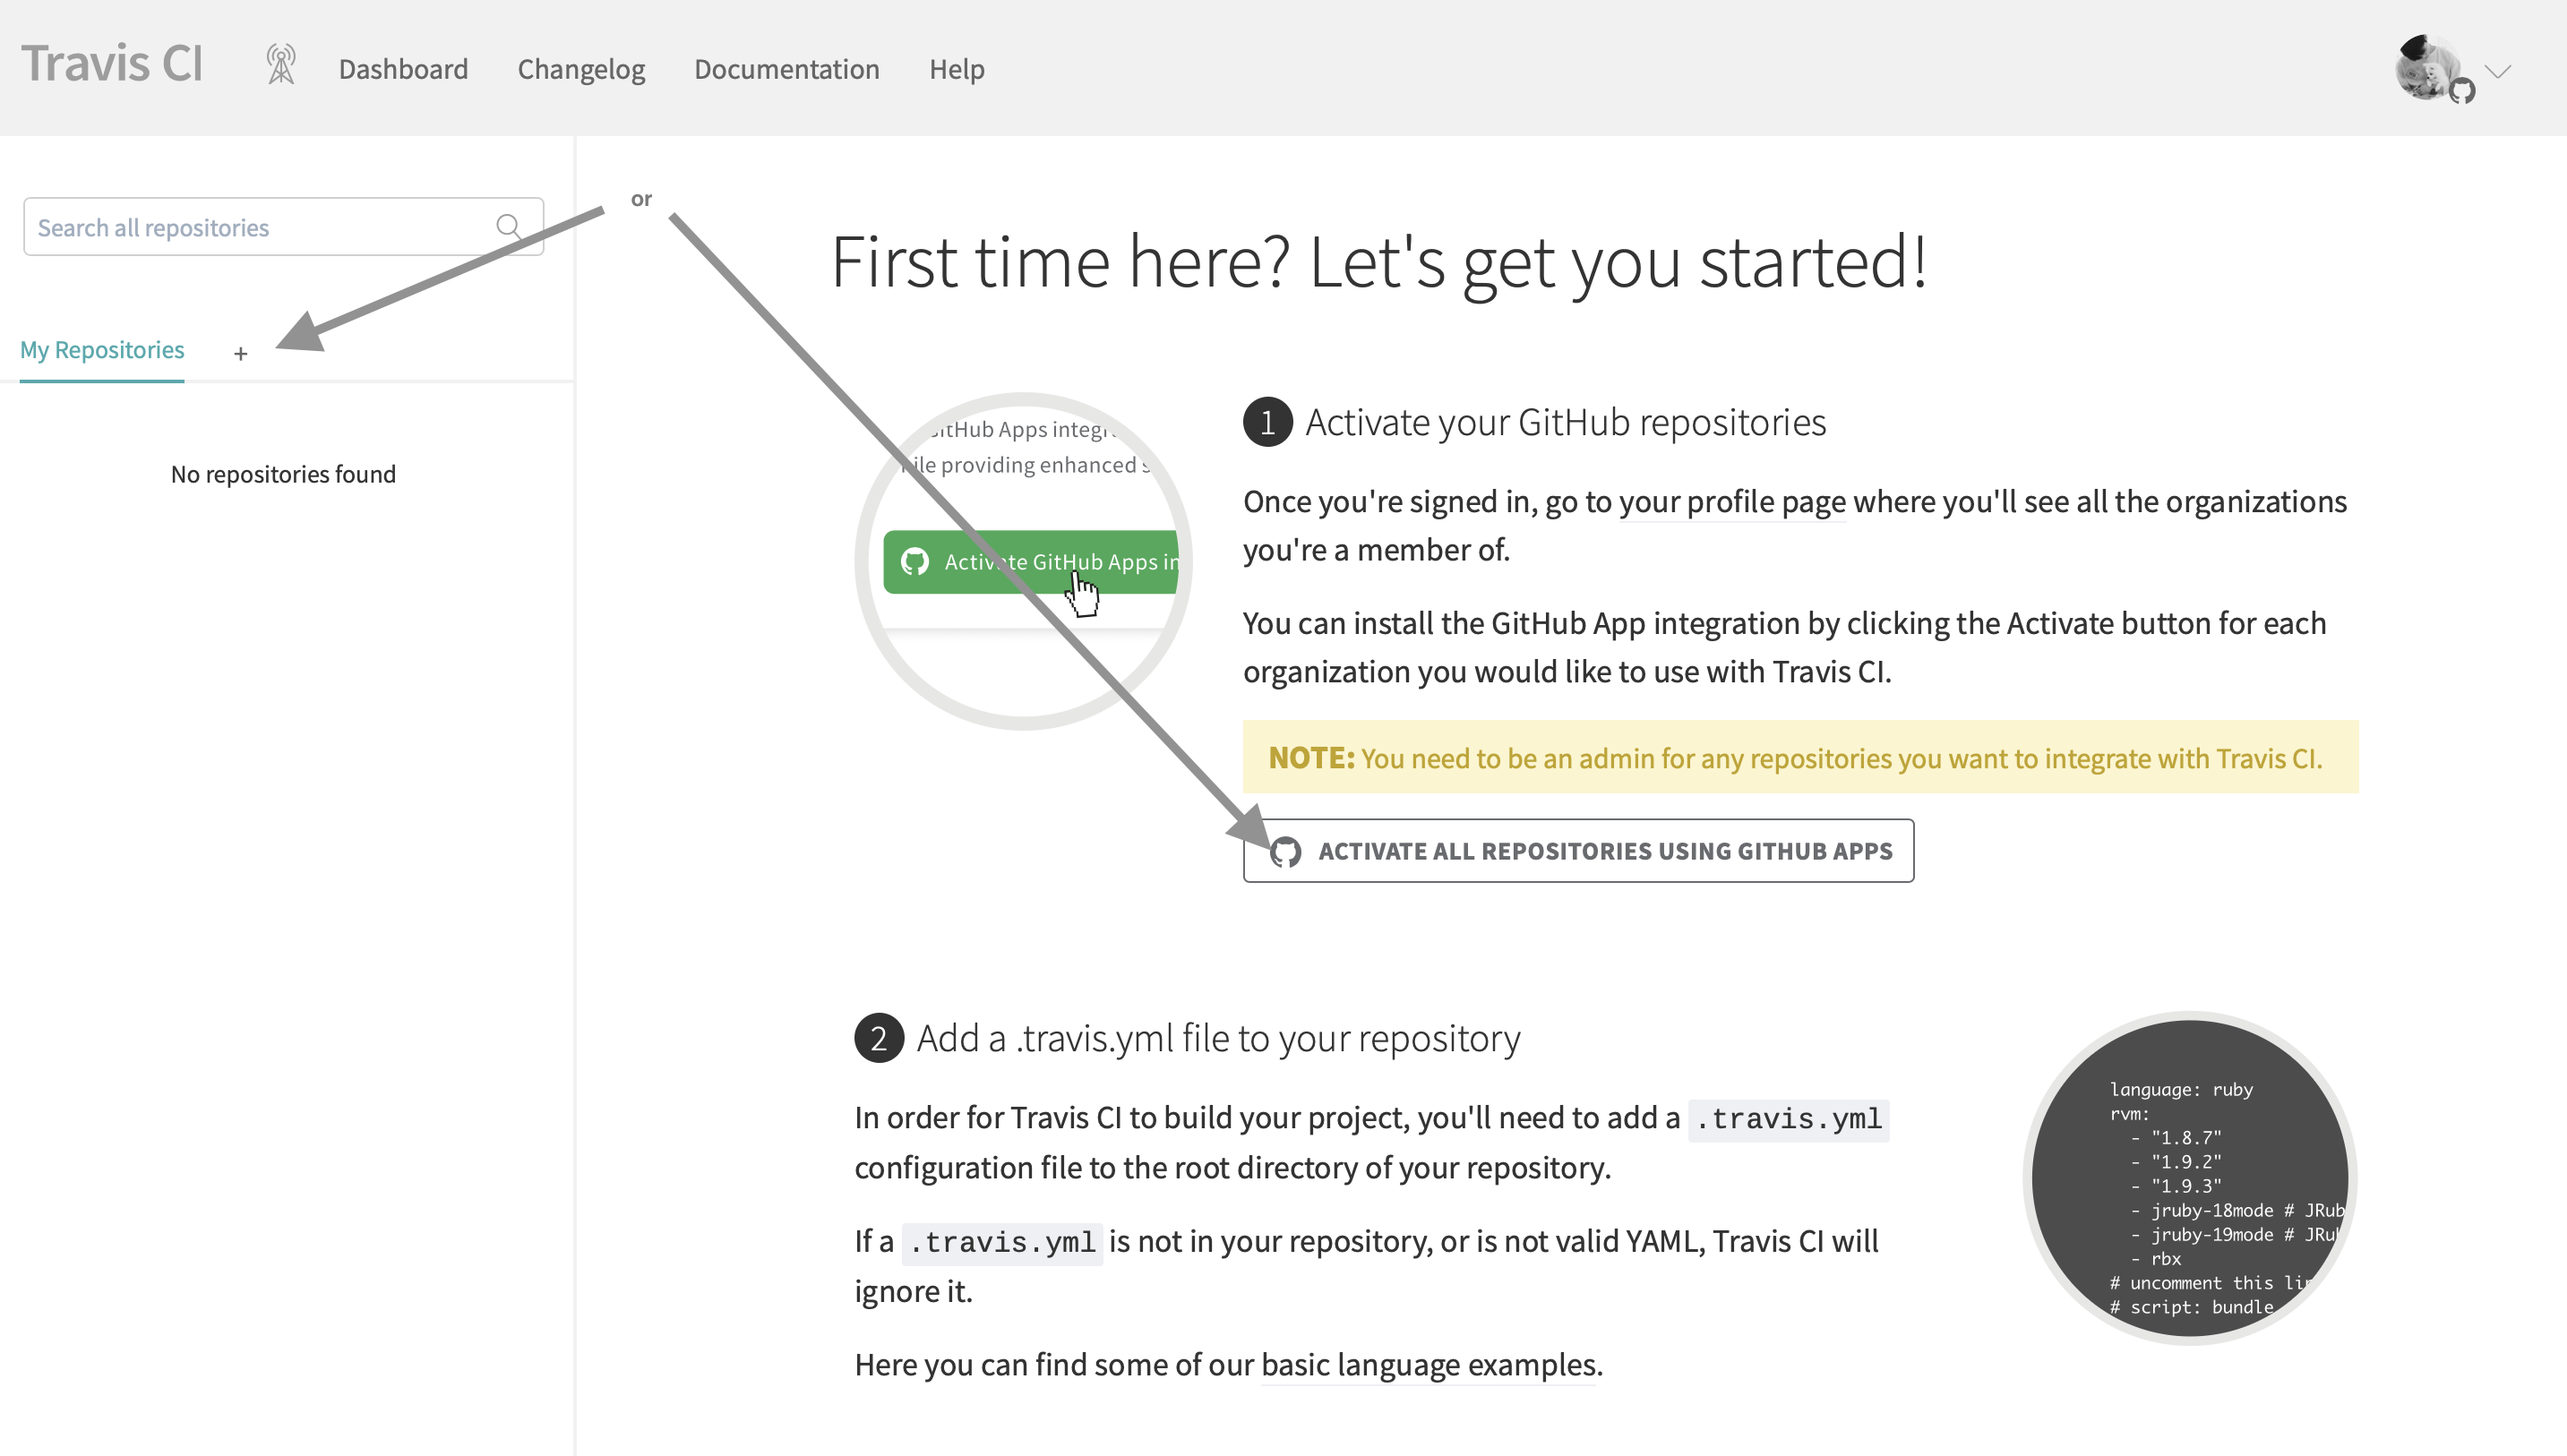
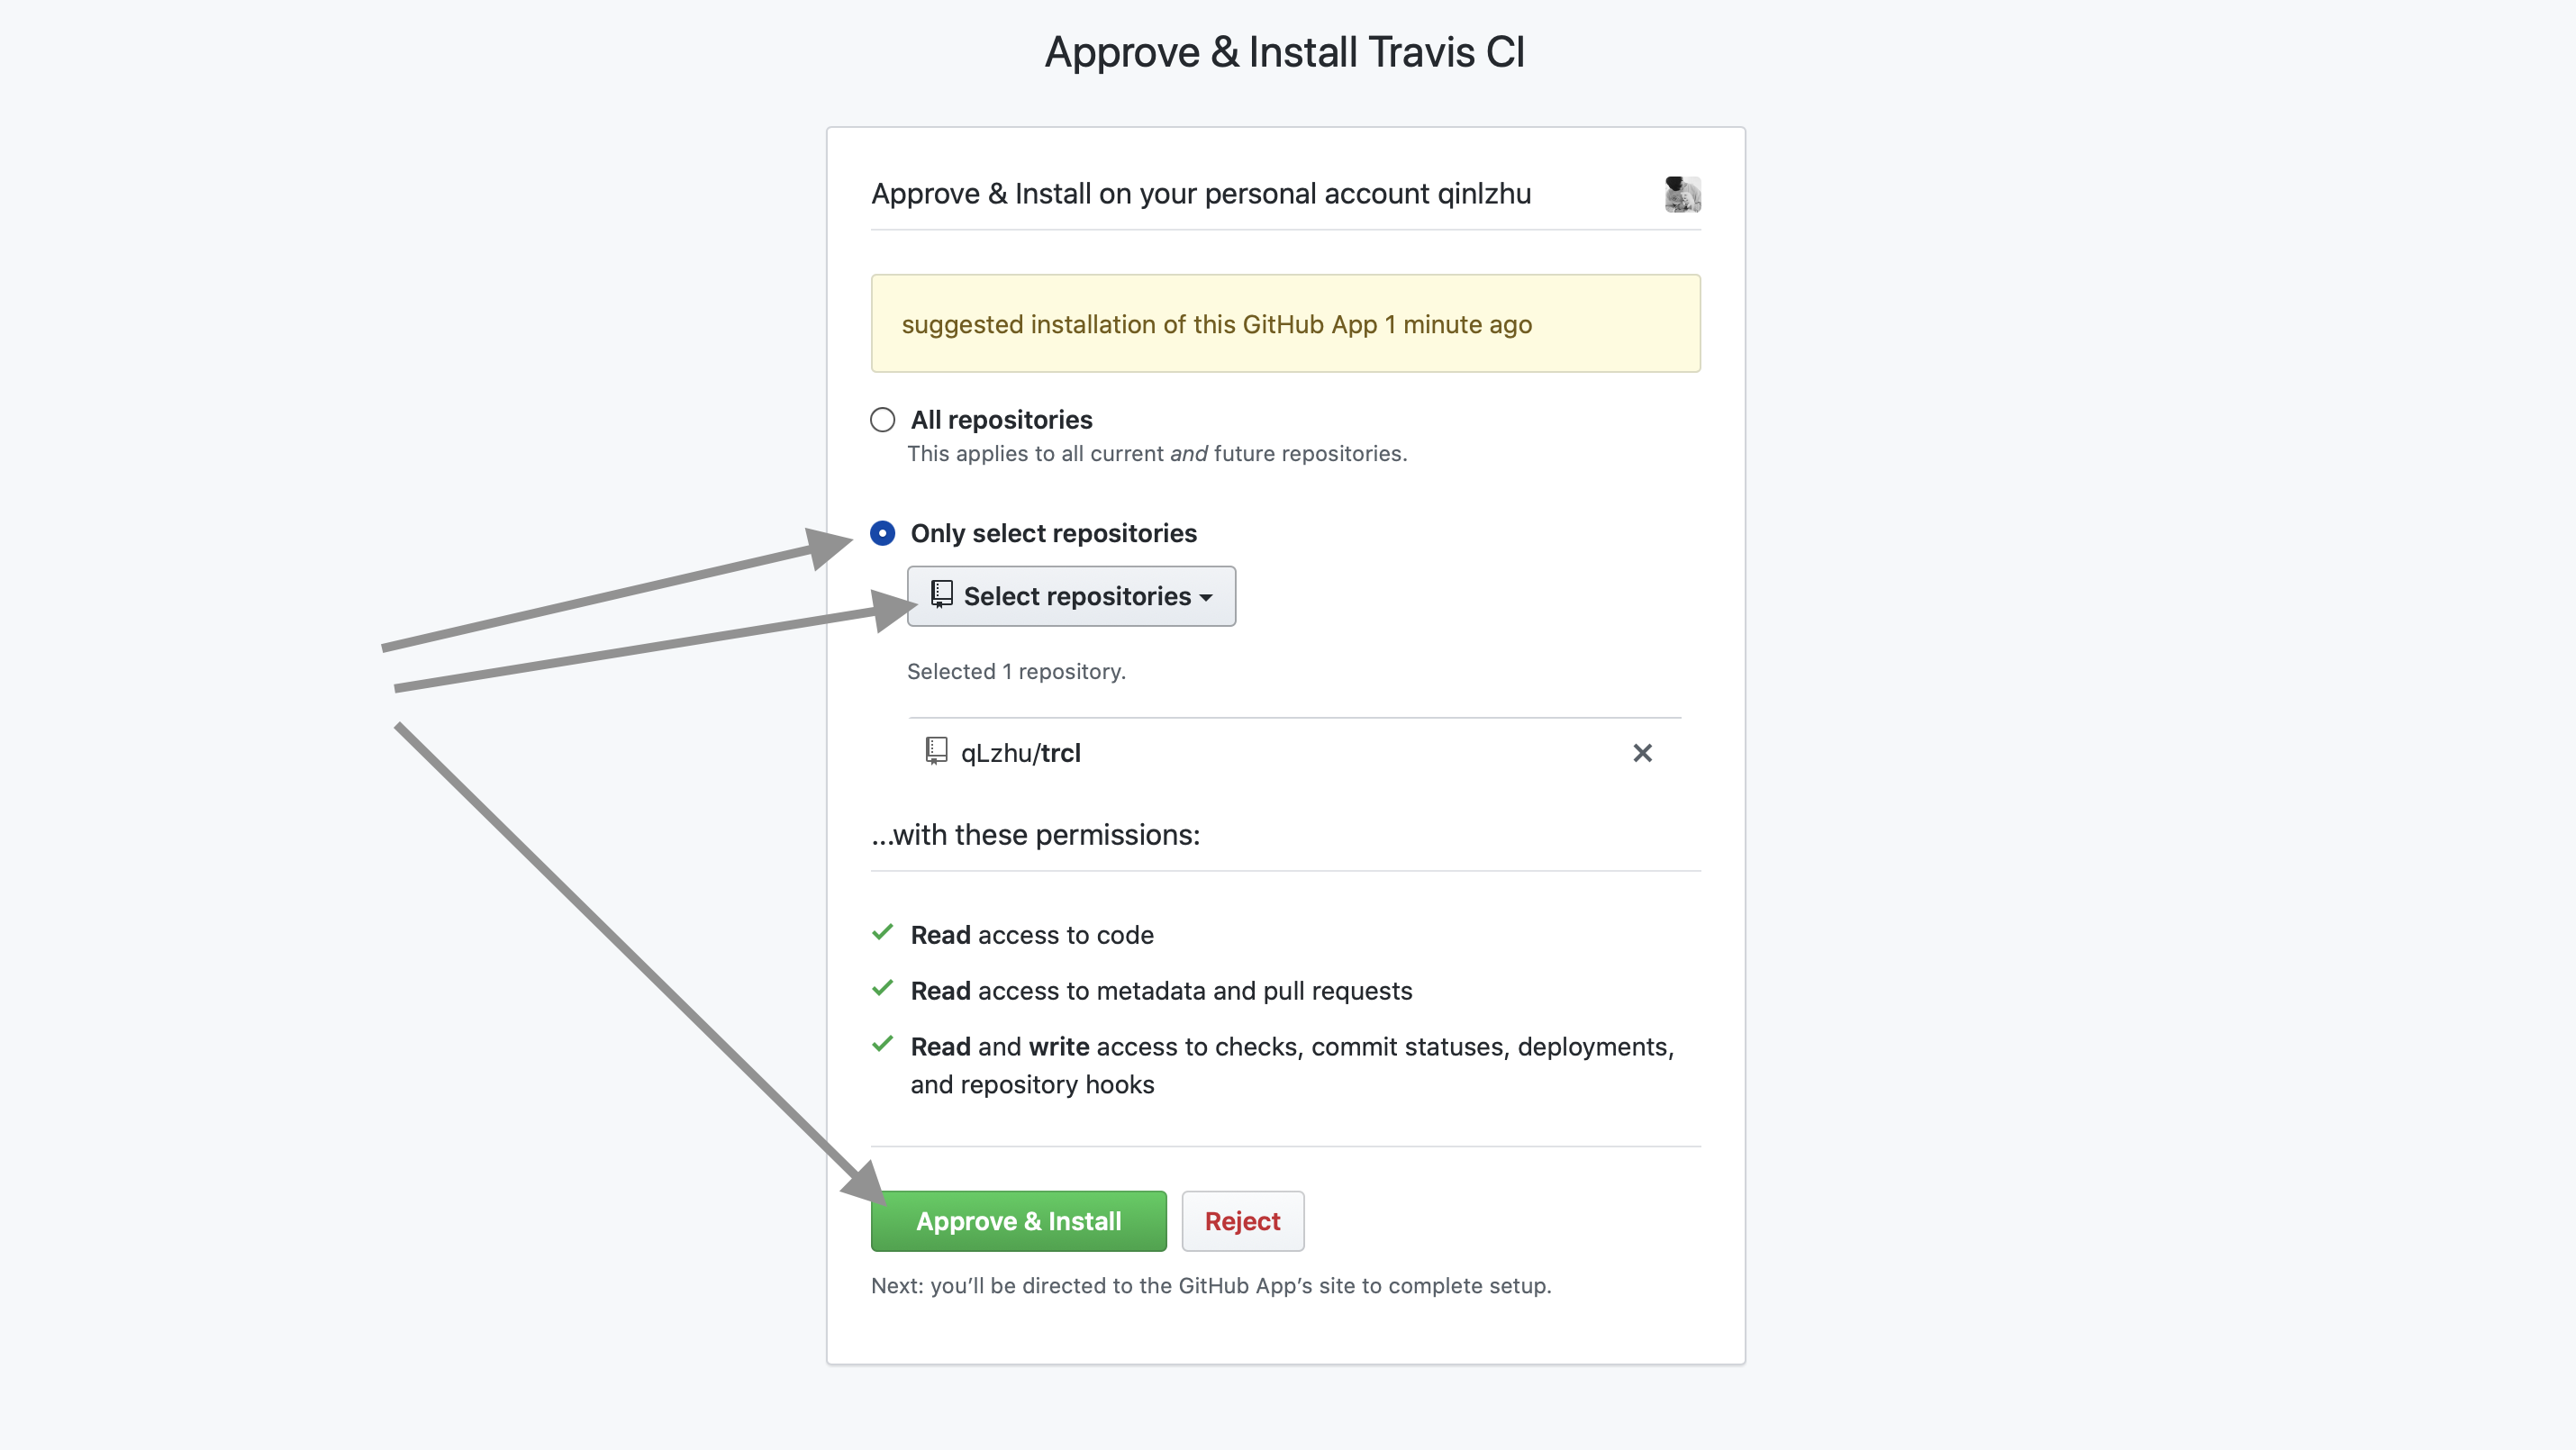
Travis CI 部署到我们 trcl 项目后,我们还需要在 Travis CI 里把上一步创建的 token 值,配置到项目内
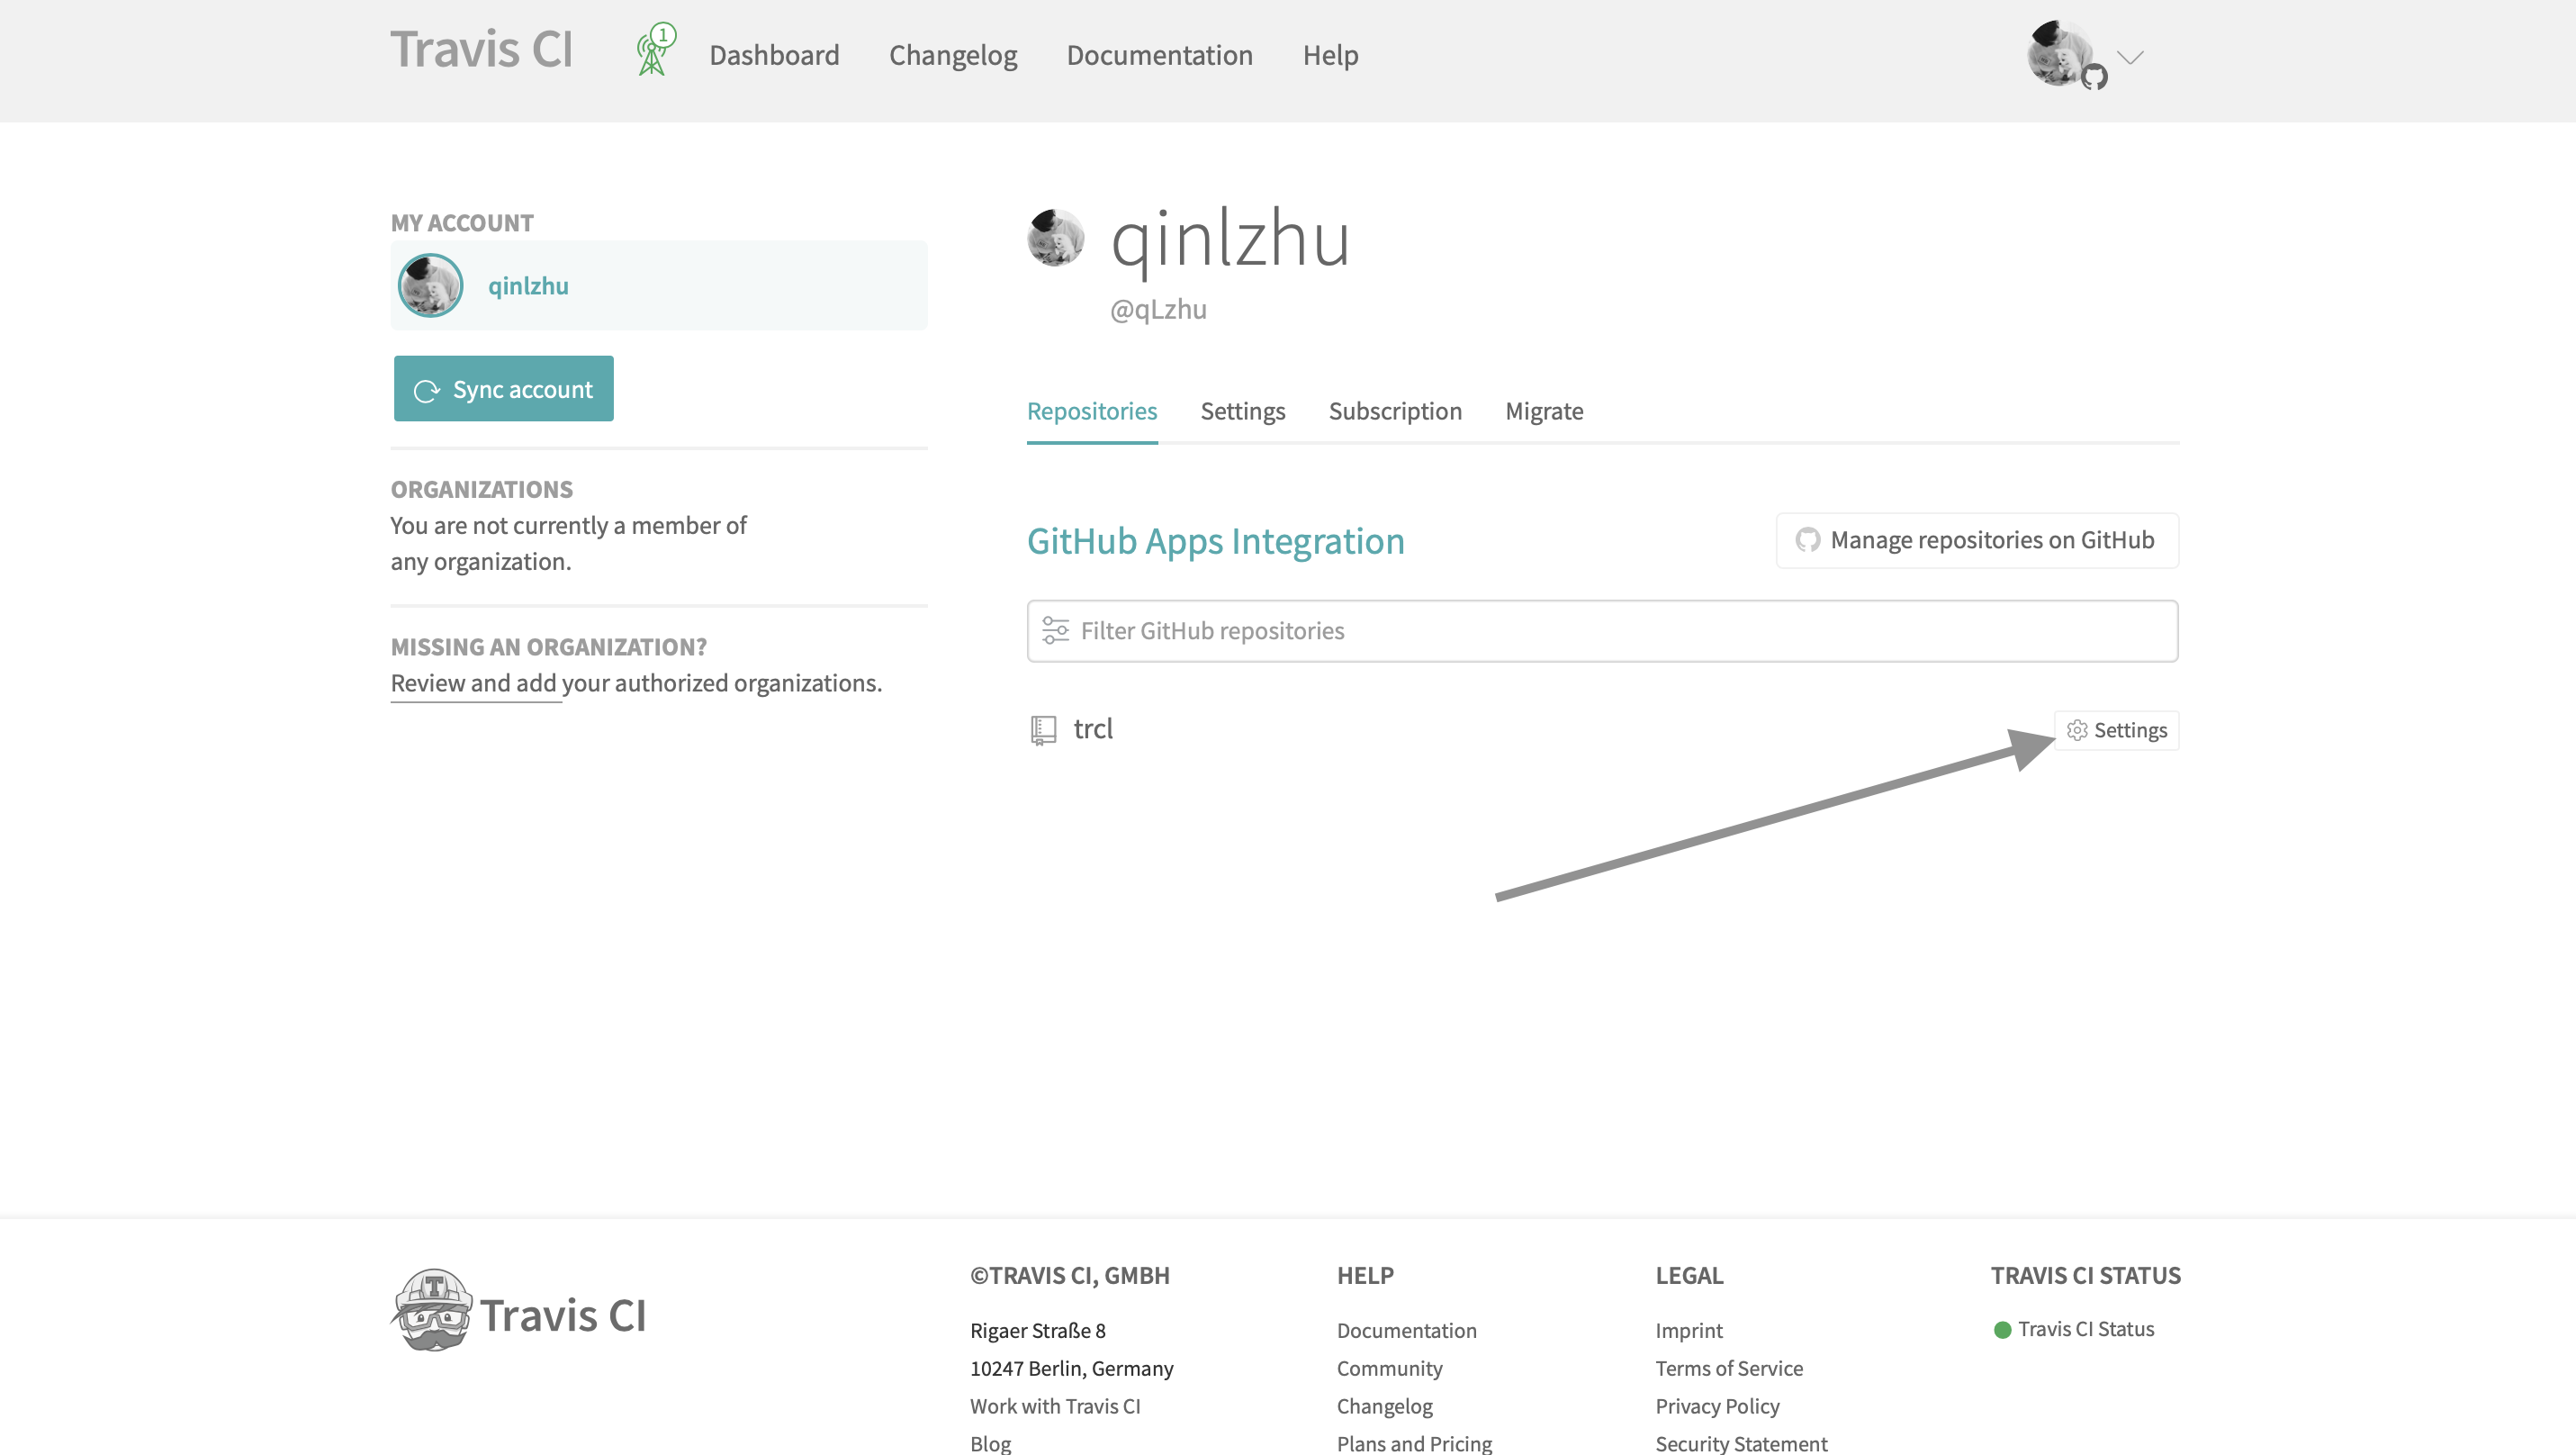
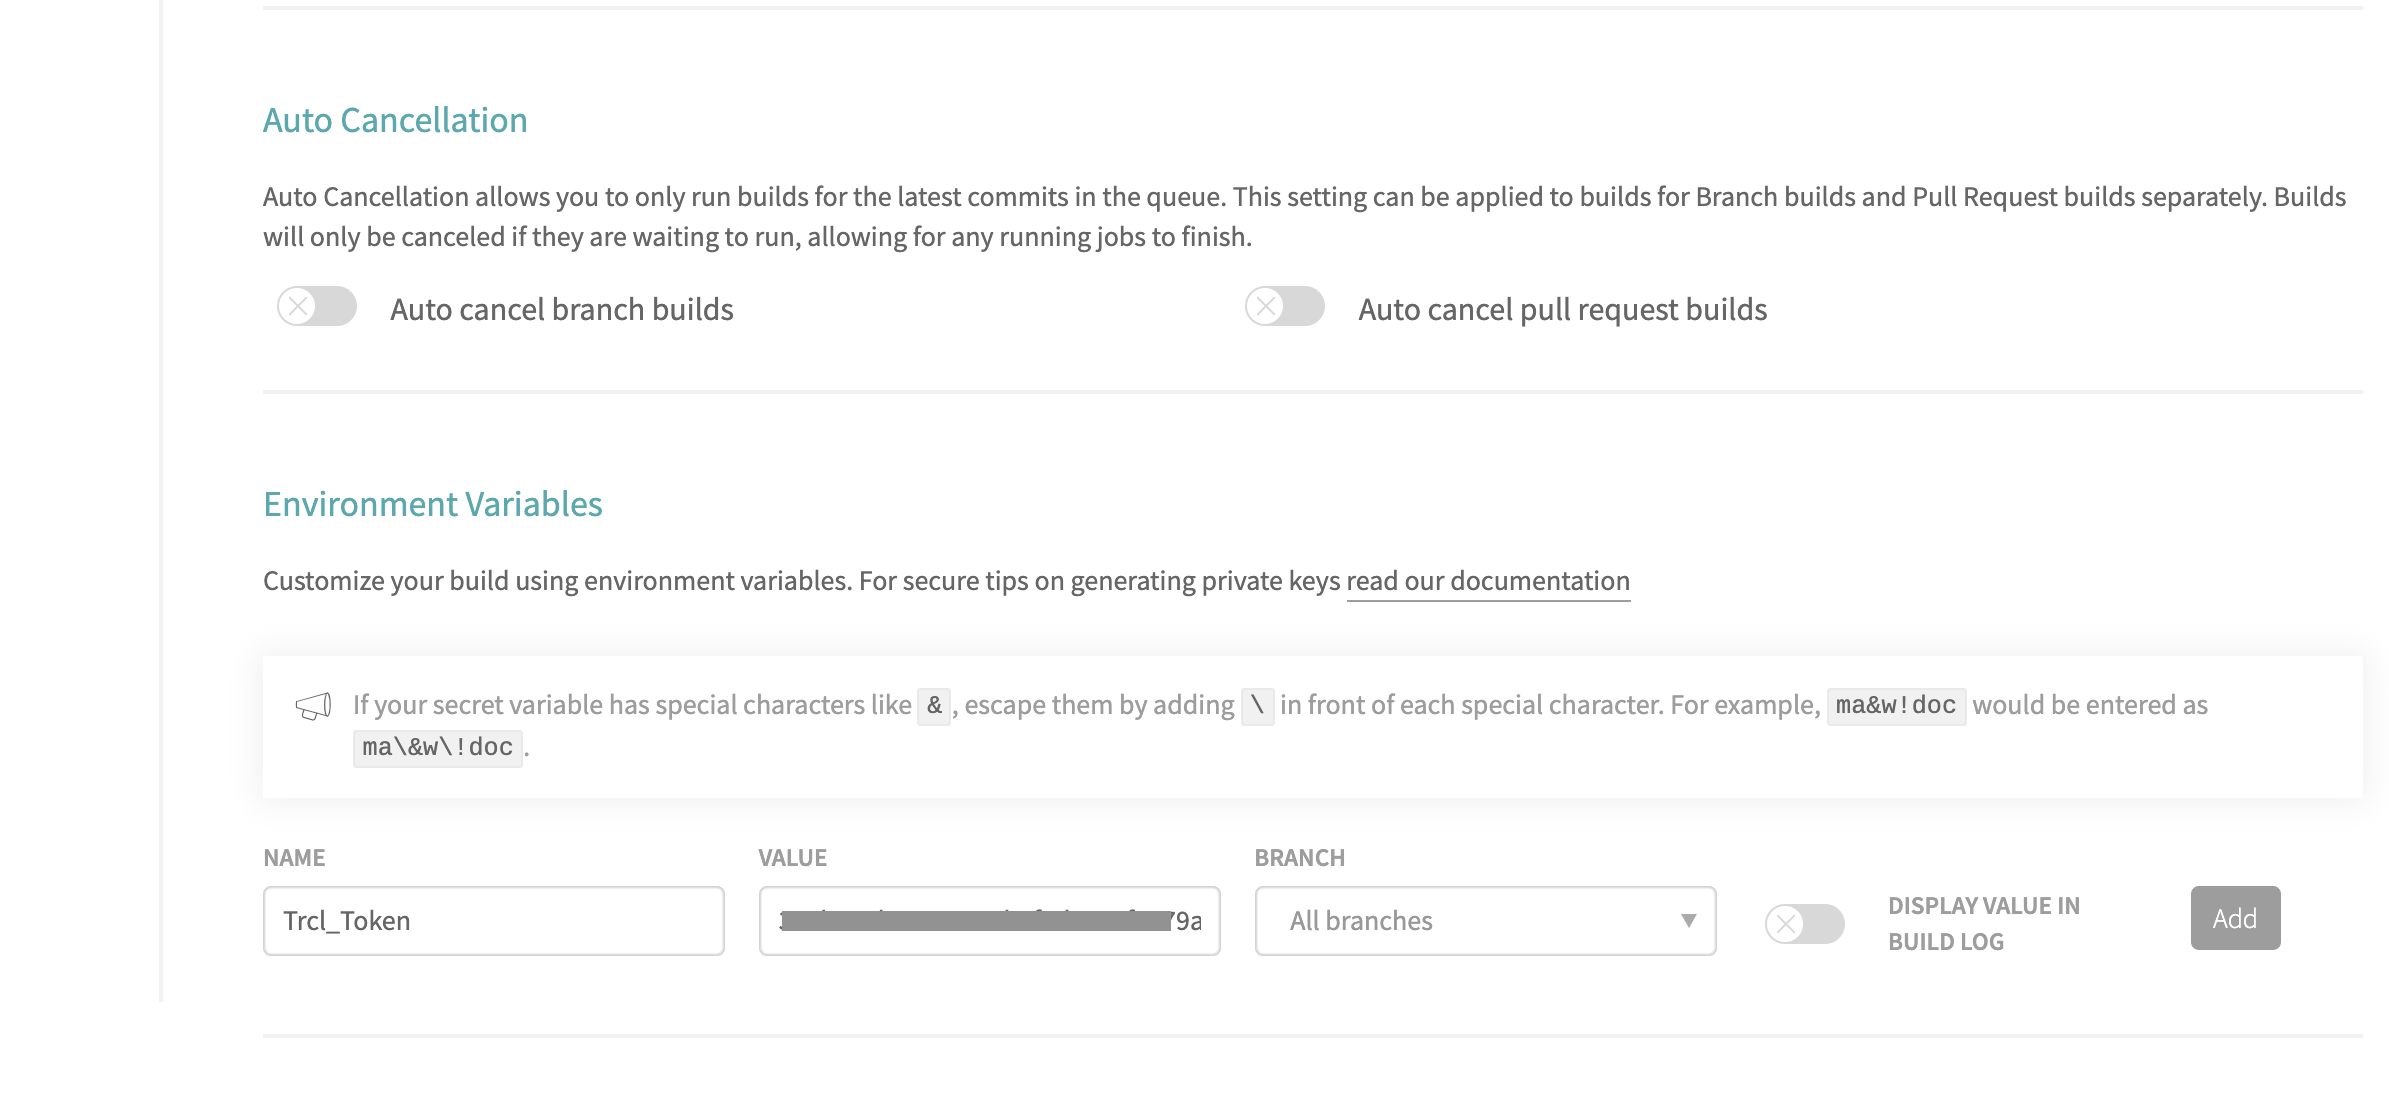
说明:
“NAME” 名称随便定义
“VALUE” 填写上一步创建的 token 值
“BRANCH” 选择要监测的分支
“DISPLAY VALUE IN BUILD LOG” 是 token 值是否显示在日记的意思,不用开启
设置 .travis.yml
上述步骤全部完成后,我们就需要设置 Travis CI 的配置文件 .travis.yml 啦
1 | language: node_js # 指定环境及其node_js版本 |
按照如上配置设置完成后,分别执行下git add、git commit 和 git push 提交下
此时你再回到 Travis CI 应该可以看到构建成功的界面或者正在构建的界面(如果构建失败,解决问题后重新提交 commit,再点击 Restart build 重新执行即可)
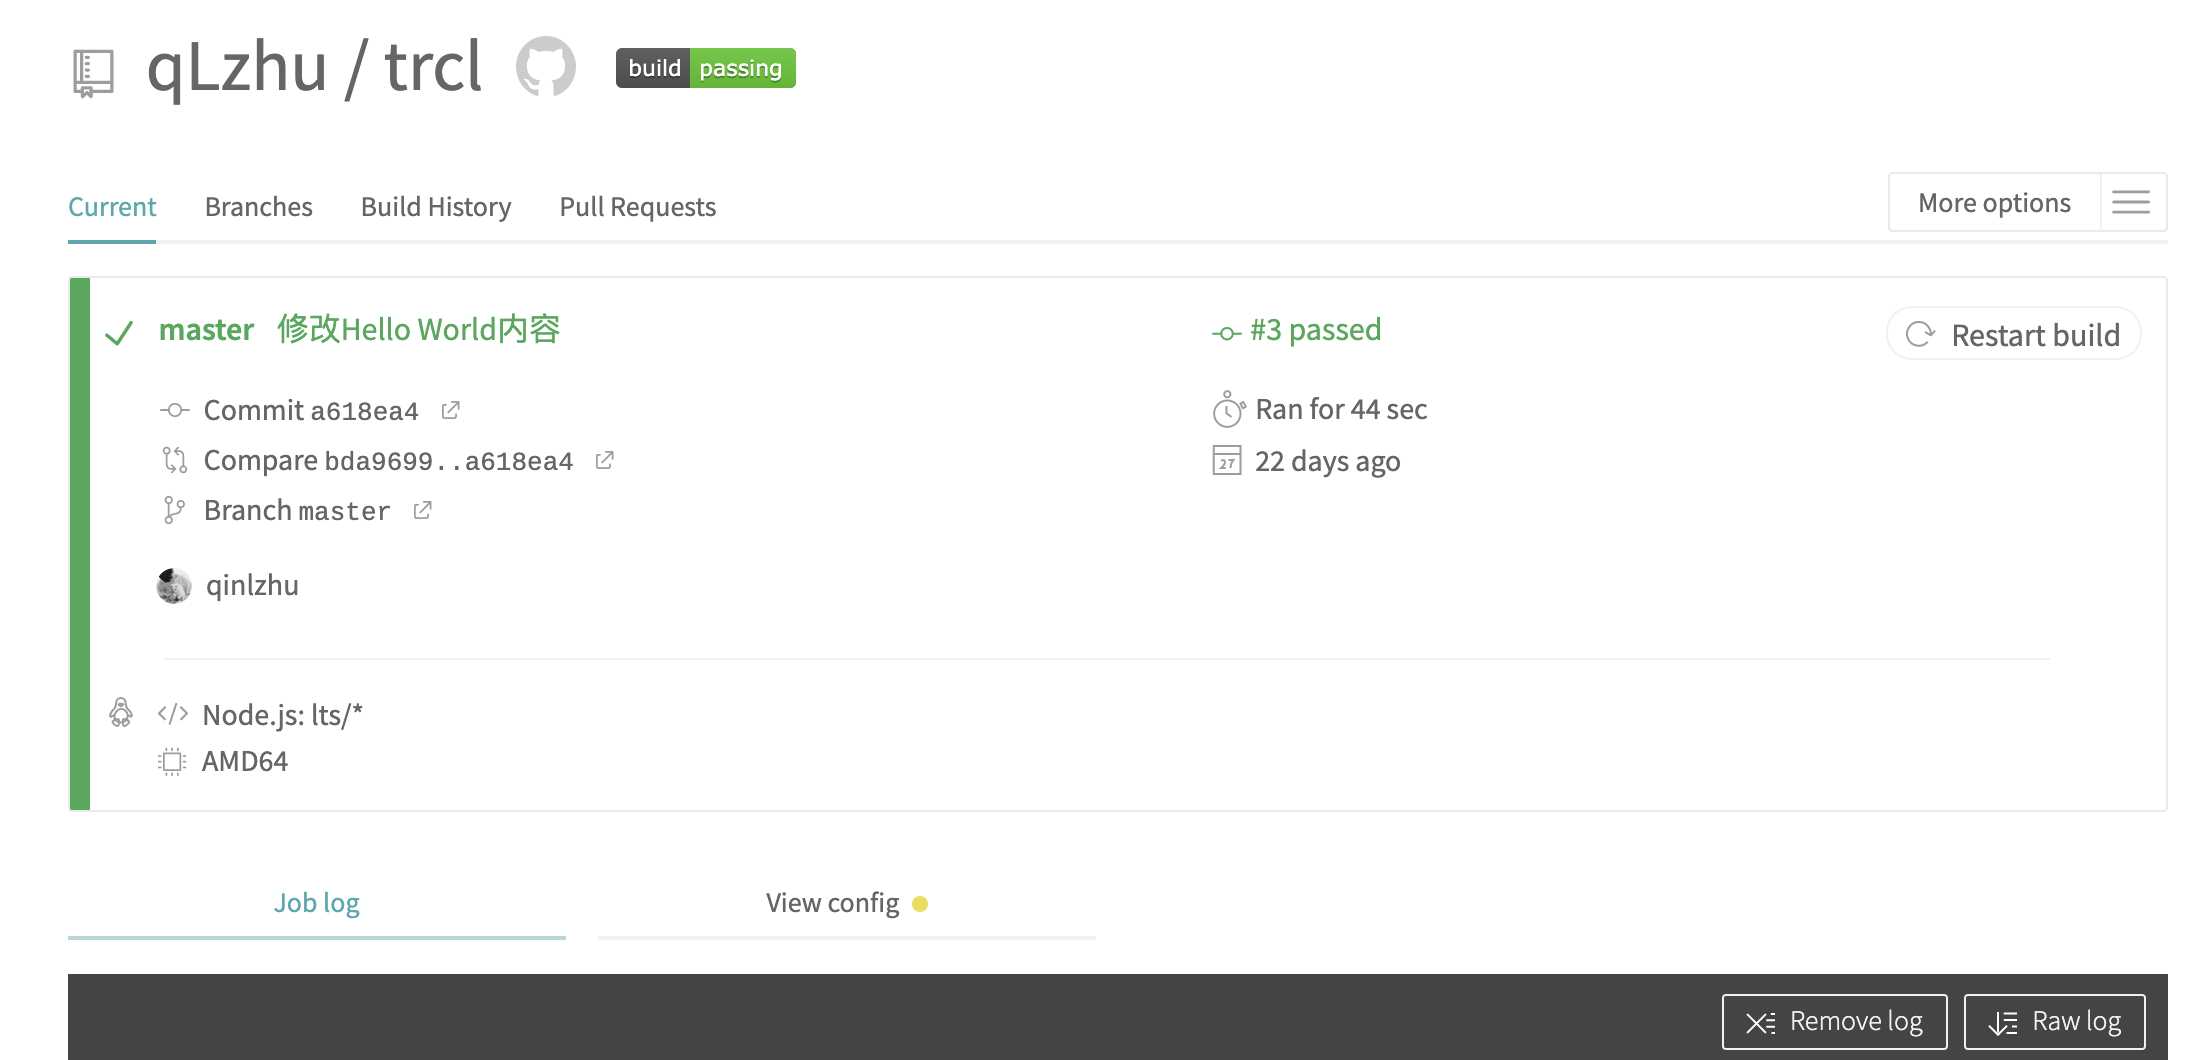
另外点击 build passing 图标,还能够获得其链接,可以将它贴在其他地方,随时监控博客的 build 状态
删除 Travis CI 项目

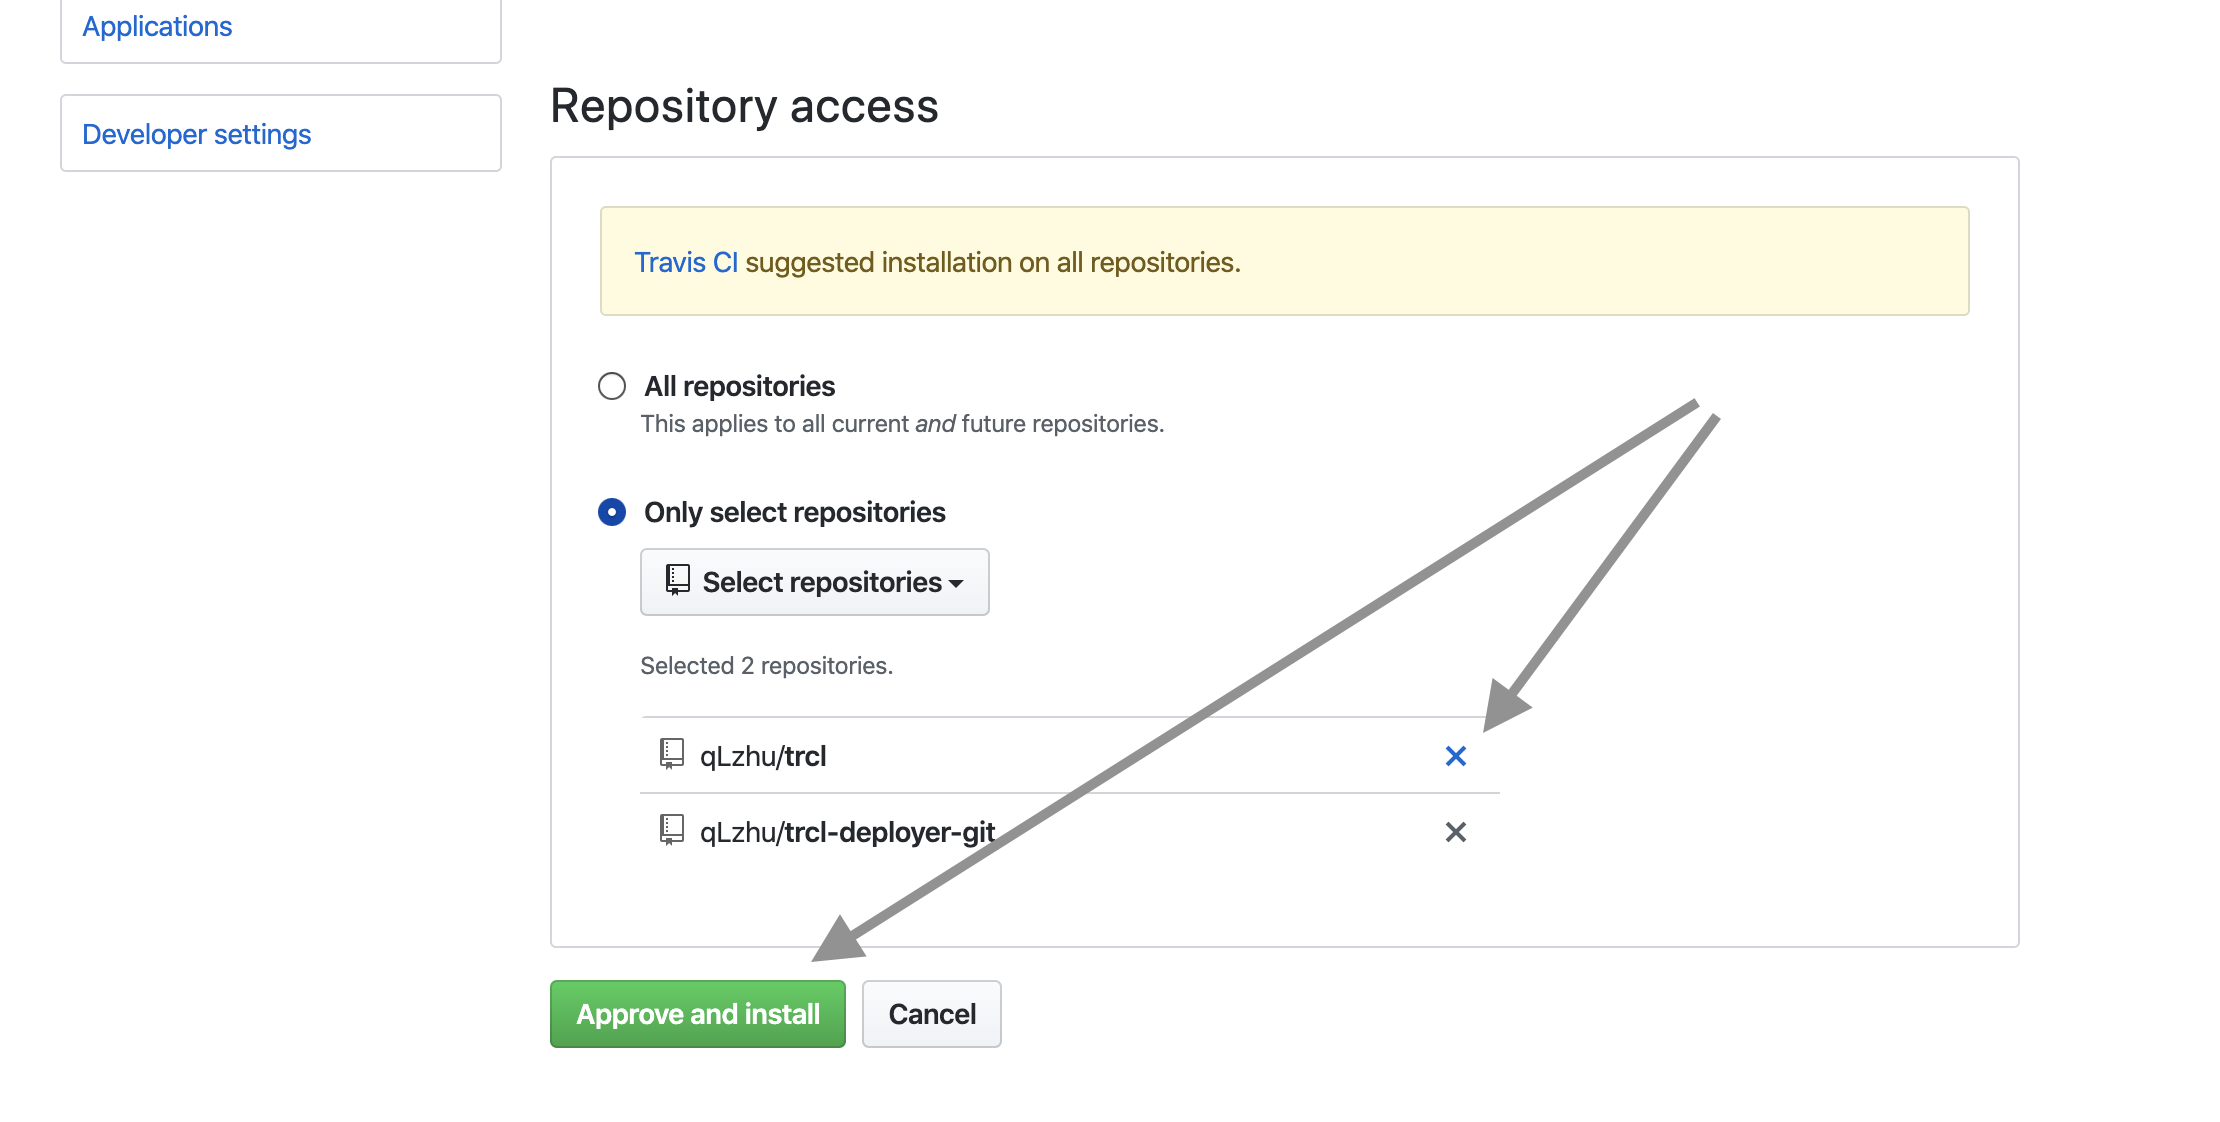
- 单个项目时,直接在 Github 上删除仓库即可
- 多个项目时,按照上述步骤删除部署 Travis CI 的项目